

Gameboy DMG Modification: RIPS v4 Screen (+Others)
Everybody knows what a Gameboy is so I'm not going to introduce it! The one specifically that I'll be referencing in this post is the 'DMG'- also known as the original Gameboy model from 1989.

The Gameboy as it originally was; the shell was in nearly
perfect condition, so I felt a bit bad swapping it for
something cooler. The only notable damage was some
battery corrosion and some crusty glue causing the screen
lens to fall off.
I got the main system (mostly I just needed the motherboard) from Facebook Marketplace for a smooth $50- not bad at all for something in such nice condition!
I've been modifying Gameboys for a while, but I'm still not very good, so I decided that this was a good chance to attempt something that required soldering! The RIPS v4 screen only requires soldering on the speaker wires, and because of this, I also decided to order a fresh new speaker from Funnyplaying. It's clear with red accents, so it went with the color scheme I decided on as well.
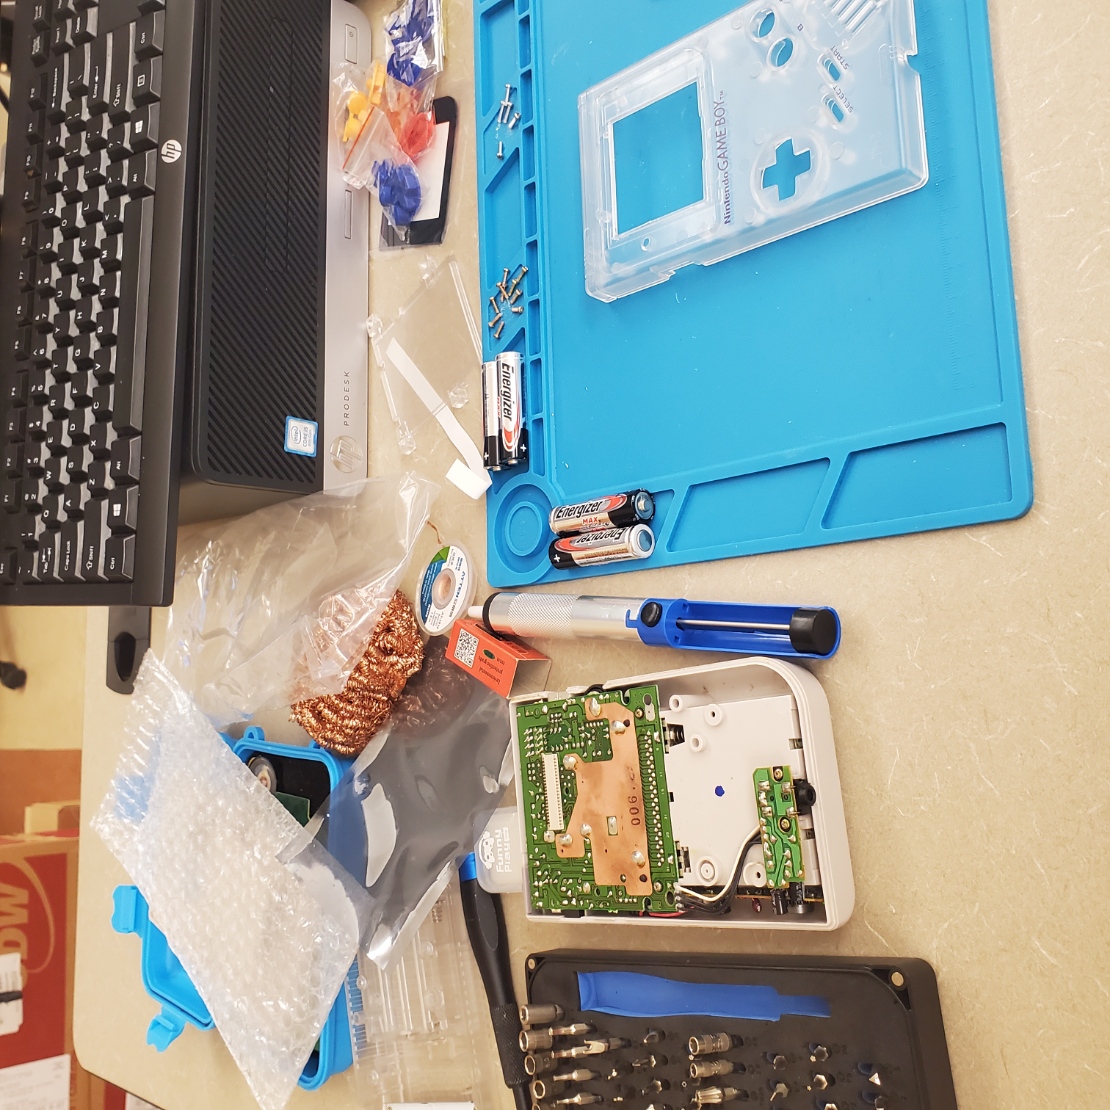
This is what my workspace looked like before I really got
started! As you can see it is a mess. I did all this during my
computer informational systems class at school, where I have
a flat desk and access to Good Screwdrivers.
It's a bit difficult to see, but I have three sets of buttons- Red, Blue, and Yellow. I really wanted to go with a primary color-on-clear case thing for this Gameboy, as all my other projects so far have really just been one color. In the picture to the left, I had just taken the casing off, and was preparing to put the front screen in place!
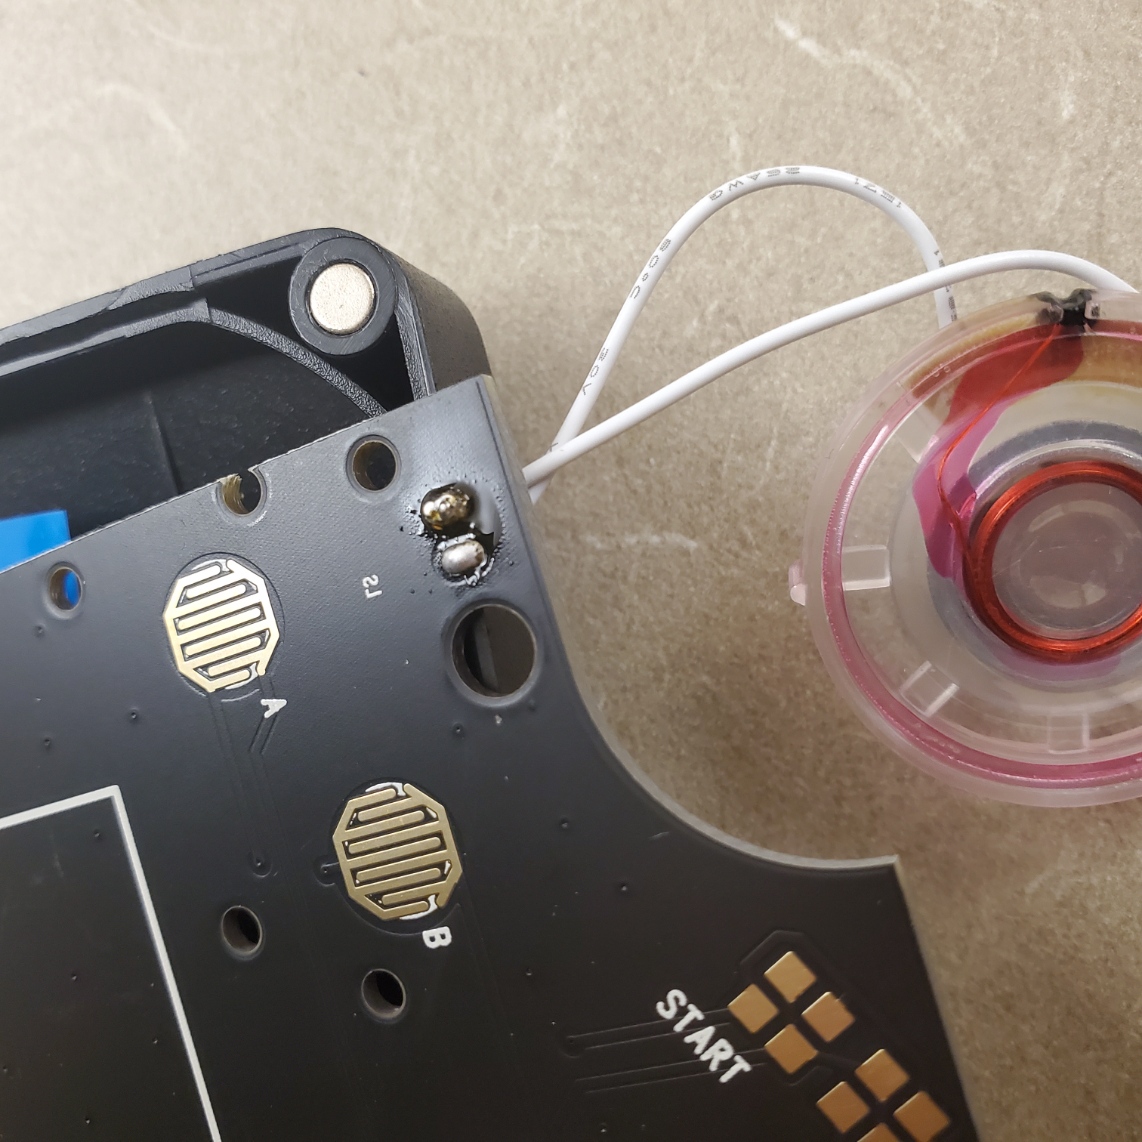
An up-close picture of my soldering joint, because I'm really
proud of it! I've never successfully soldered something
before, so I'm so relieved it works! I was so nervous...
According to the YouTube tutorial I was following, the first step was to solder the (in my case, new) speaker into the RIPS board! Gameboy DMGs are unique from other models in that they have two boards. The motherboard is the main one, of course, but the one that I really had to work on was the screen board! This is also the thing that controls button presses and audio output. The two-layered setup that the DMG has made it sort of a pain to take apart and put together, because there's a really annoying ribbon cable. It doesn't even have any clips or anything to hold it in place, I was just shoving it in and praying. (Did they have clips for ribbon cables back then? I honestly don't know.)
I have no idea why it looks like you can see the OEM speaker
in this image. Did I just sit the front-end of the Gameboy on
top of the old screen board? Why would I do that.
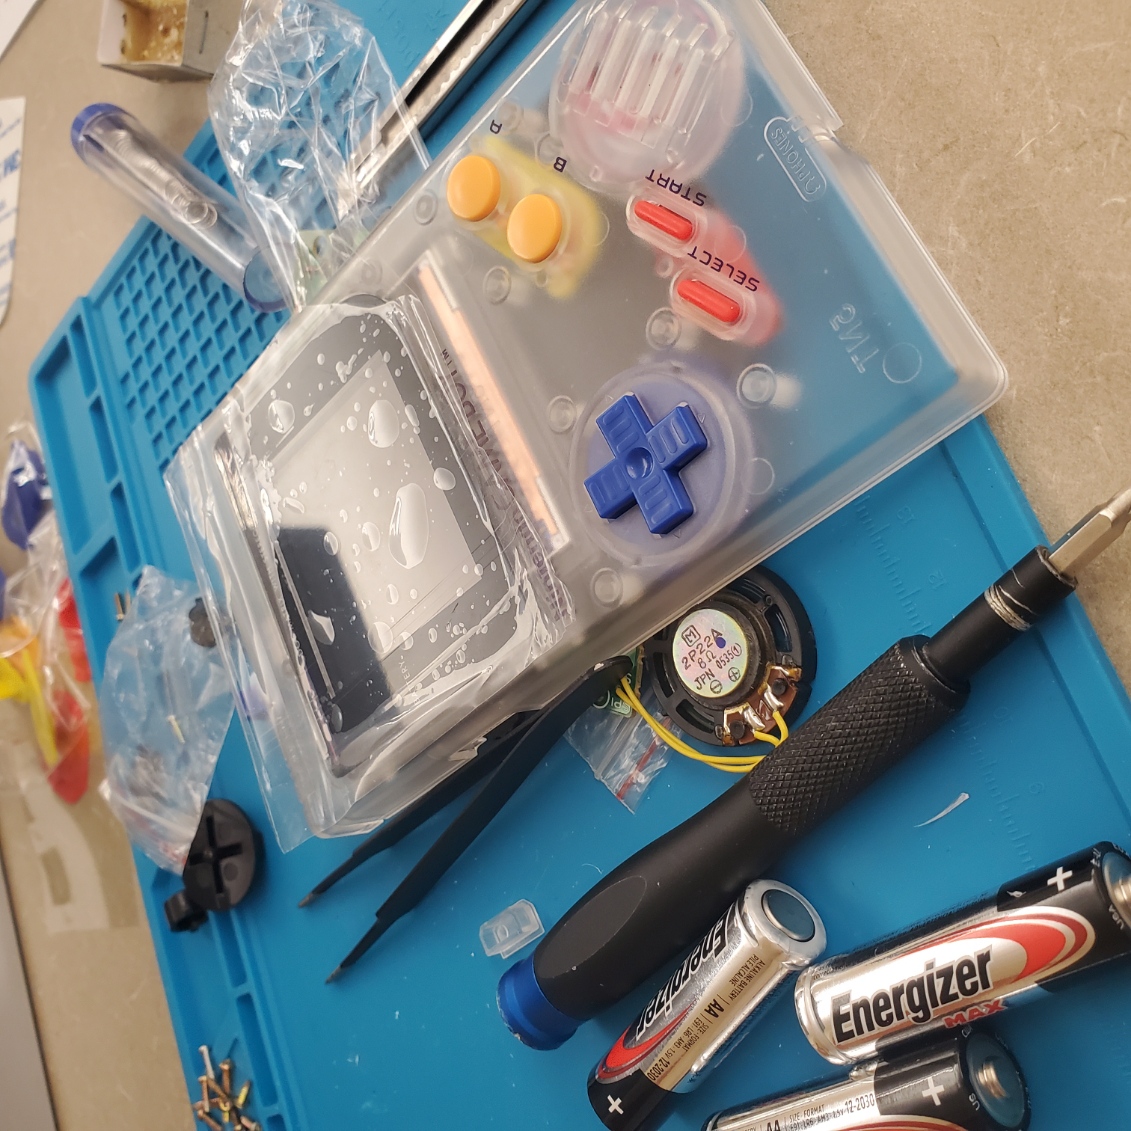
Once the speaker was in place, the rest of the project was essentially just assembly. I put the buttons (and their color-coded membranes!) in place, then the screen and its backet. I put on the screen lens at this stage, too, being very careful not to remove the plastic wrap because I did not want to scratch the glass.
As it turns out, the RIPS v4 IPS screen is a smidge bigger than the OEM screen from Nintendo! That's very unfortunate, because my nice glass screen lens I ordered was ever-so-slightly too small, and so was the casing! I've decided to ignore it, because god that's not something I want to have to wait a week to have mailed my way. It very rarely is noticable, and I've definitely played on worse-aligned screens (looking at you, Gameboy Advance IPS kit that doesn't come with the bracket), it's just the tiniest bit frustrating and you might notice when I show the final product.
After all this, putting the thing together should be easy, right? I tested the screen via gently pushing all the parts together without screws, and it worked! Even more shocking, the audio worked too! All that's left is to screw things in!
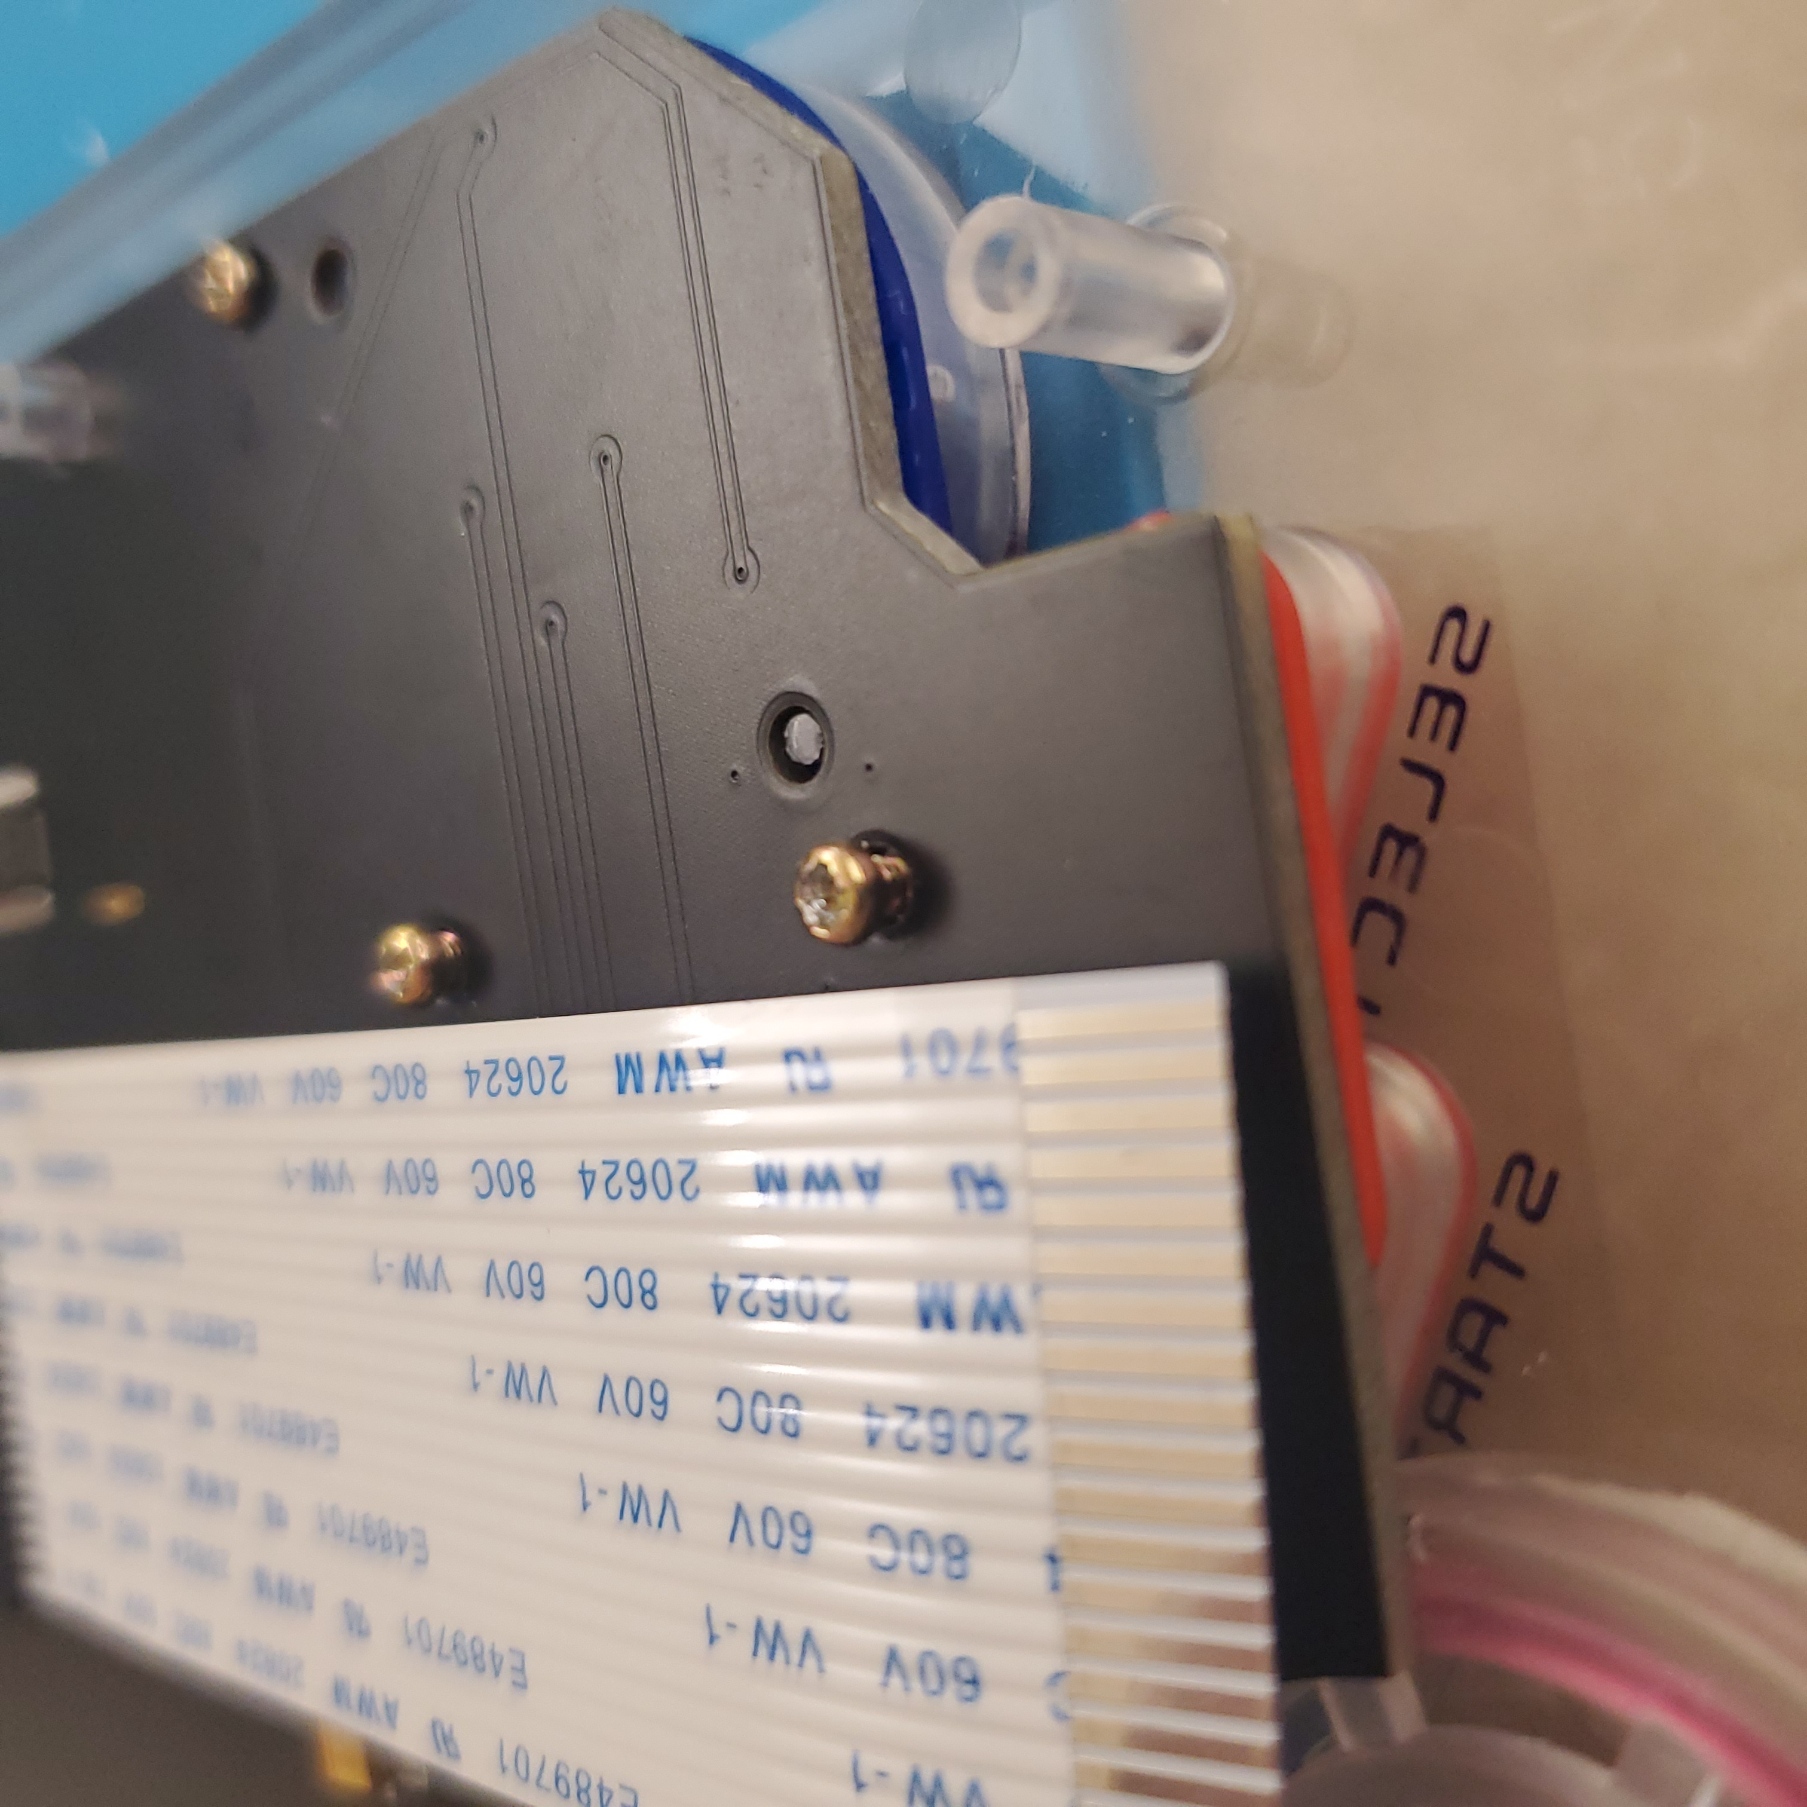
WOW these screws sure don't fit, meaning the boards are
not secure whatsoever!
You fool. You buffoon.
As a rule of thumb, I try to use as many OEM parts as is possible with what I want to do. Generally, aftermarket screws strip easily and are a weird size, so I often lean towards using the OEM ones that I harvest from the original Gameboy. Unfortunately, that is not the case with this build. The OEM screws were way too big, for some ungodly reason. I screwed everything together the best I could, but I couldn't get it to sit right. I genuinely thought it was something I was doing wrong, because I've never had this much trouble with screws before! And, of course, the shoddy job I did putting things together led to the thing to stop turning on somehow.
Luckily, after a day of mulling it over, I decided to just restart the putting-together-process. I unscrewed everything, gave the battery contacts a good cleaning with some 91% IPA, and put it all back together using the new screws. It worked- not only that, it feels like it's one of my sturdiest builds to date! It fits together properly now, the speakers and buttons all work, and I am easily able to change the color palettes and brightness with the built-in replacement for the contrast wheel!
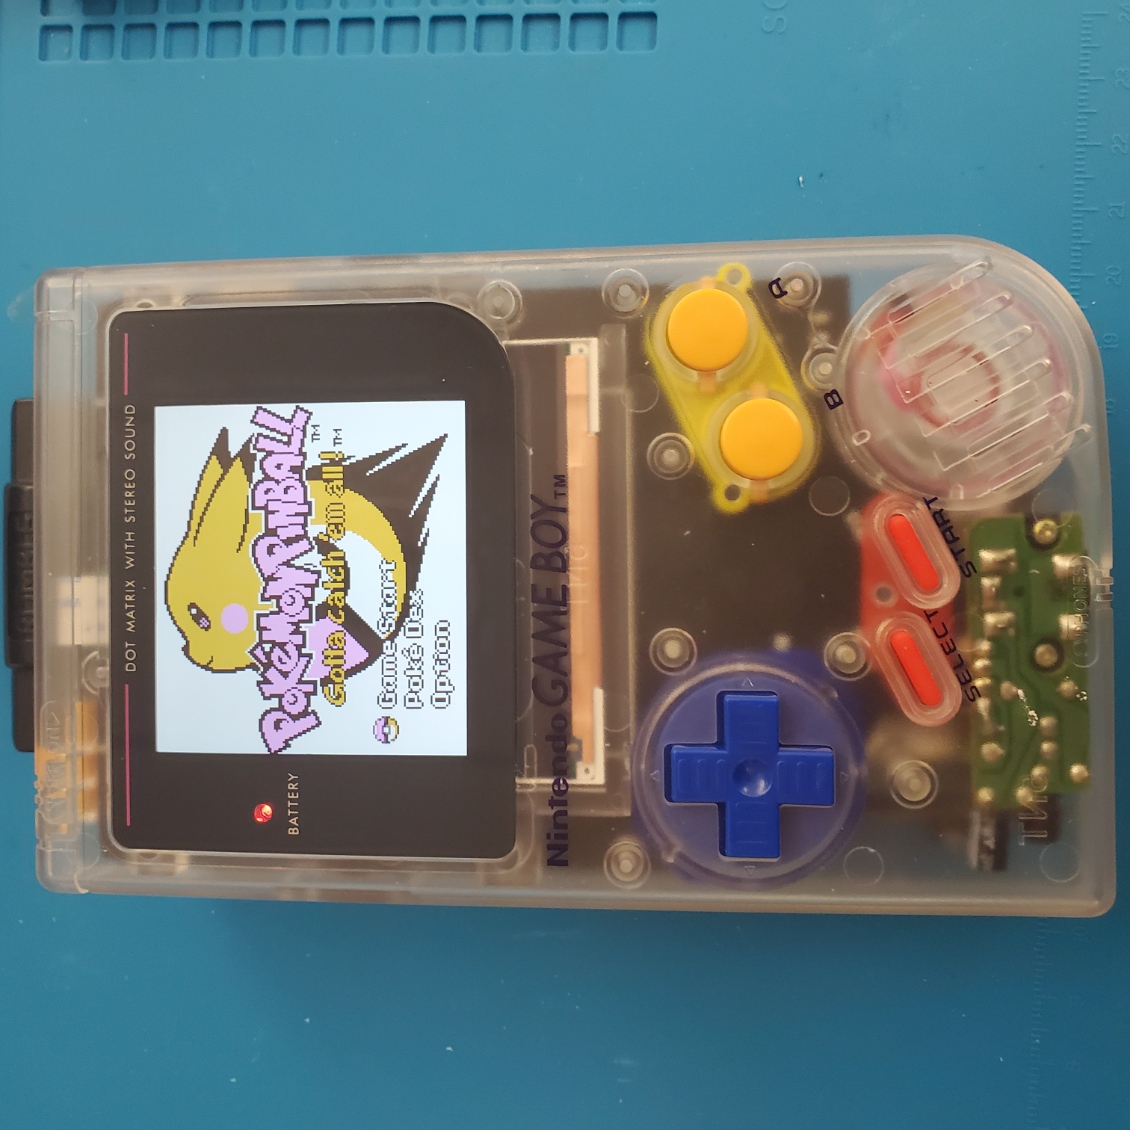
The finished product! I'm partial to the 'Super Gameboy'
color palette, myself. I'll play Pokemon Yellow on this thing...
This has to be one of my favorite Gameboy builds to date. The only downside to it is that it can only play original Gameboy games, and unfortunately one of my favorite games is on the Gameboy Color. It's fine, though; This thing has become my default way to play Pokemon Pinball, even if my other systems are more versatile, and the form factor of this absolute brick is really fun to hold. Gameboy modding is so absurdly fun. :)